Archives de catégorie : Technique

De la tech, genre sysadmin

Why Use QEMU Directly Instead of a Hypervisor Like Proxmox ?

Why Using QEMU Directly on an Orange Pi 5+ or Raspberry Pi5b with Armbian is More Efficient than Installing a Hypervisor
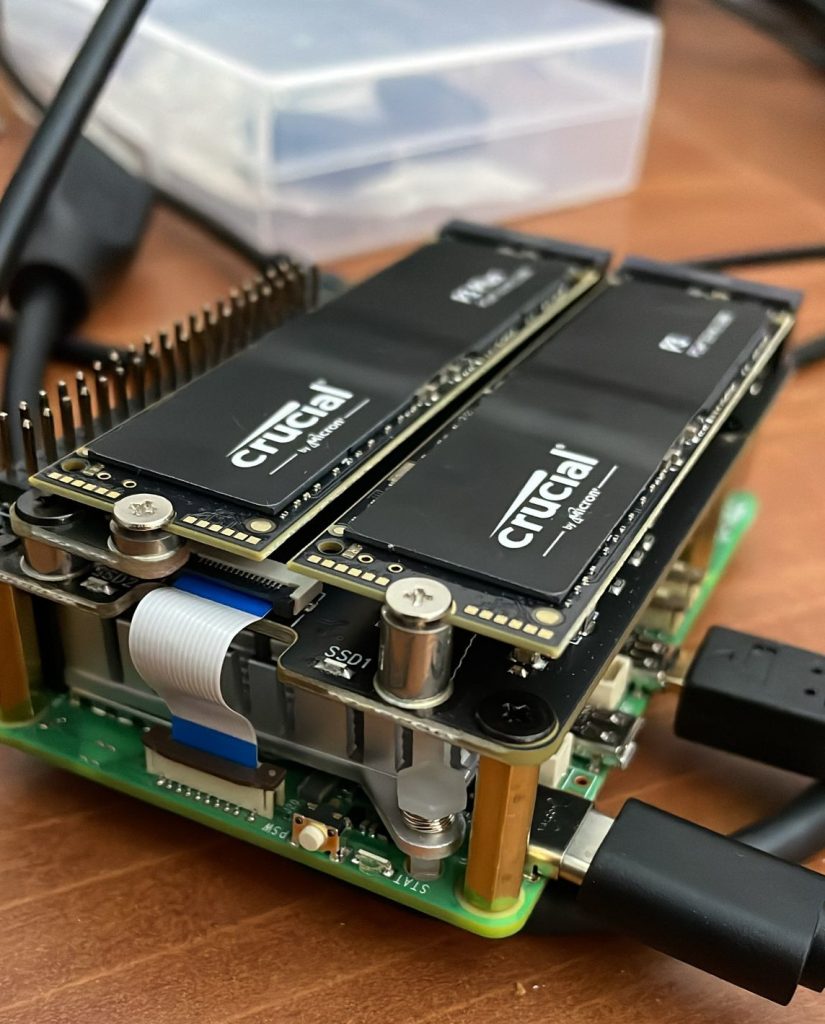
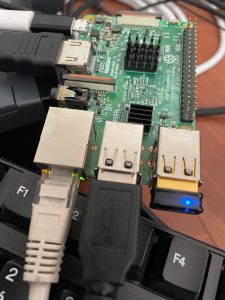
(photo: Raspberry Pi5b + Geekworm X1004 Dual M.2 NVMe SSD Shield PCIe)

When it comes to virtualizing a system like FreeBSD on an Orange Pi 5+ running Armbian, efficiency and resource optimization are critical, especially with limited hardware specs like 16 GB of RAM and 8 CPU cores (or 8 GB of RAM and 4 CPU for Raspberry Pi 5). Instead of installing a full hypervisor like Proxmox, a QEMU-based solution is much more suitable to fully utilize the available hardware. Here’s why using QEMU directly is more efficient in this scenario.

1. Maximizing Limited Resources

The Orange Pi 5+ has 16 GB of RAM and 8 CPU cores, which is enough to run a single VM like FreeBSD but not necessarily enough to handle the overhead of a full hypervisor like Proxmox. Hypervisors introduce additional management layers that consume both memory and CPU for interfaces, virtualization services, and other features that may not be needed for such a specific use case.

QEMU allows you to manage the virtual machine directly without unnecessary intermediaries, letting you allocate all available RAM and all CPU cores to the VM without having to sacrifice resources for extra services.

2. Simplicity and Lightness

Hypervisors like Proxmox are designed for complex infrastructures, offering features like clustering, high availability, and multiple VM management. These features are overkill on an Orange Pi 5+ that doesn’t need such advanced capabilities. QEMU, on the other hand, can be launched with a simple command, offering a lightweight and minimal solution that does exactly what’s needed—run a VM.

For a single FreeBSD virtual machine, all you need is direct access via QEMU, minimizing both memory and CPU usage.

3. Better Utilization of 8 CPU Cores

The version of QEMU provided in the Armbian distribution allows full use of the 8 CPU cores on the Orange Pi 5+. Unlike a hypervisor, which may limit or reserve CPU cores for its own usage, QEMU lets you allocate all CPU resources directly to the VM, maximizing virtual machine performance.

4. RAM Optimization

With only 16 GB of RAM, every megabyte matters. A hypervisor like Proxmox uses a significant portion of memory for its own processes—network management, user interfaces, and other services. This leaves less memory available for the virtual machine itself.

With QEMU, memory consumption outside the virtual machine is minimal, allowing almost all RAM to be allocated to the VM, thereby maximizing system performance.

5. Hardware Compatibility Workaround

For example, FreeBSD doesn’t support the Orange Pi 5+ hardware well when run directly on the physical machine. Using a hypervisor to overcome this issue might seem like a good idea, but it adds an unnecessary layer of complexity. QEMU can be configured directly to virtualize the hardware in a way that FreeBSD can run smoothly without dealing with hardware compatibility issues.

6. No Superfluous Features

Hypervisors like Proxmox often come with features like snapshot management, live VM migration, and web-based management interfaces. However, in this use case, where you are running a single VM on an Orange Pi 5+, these features may be unnecessary.

QEMU doesn’t bother with these extra features. It focuses solely on running the VM efficiently, reducing complexity and resource consumption.

7. Easy Adaptability and Automation

Launching a VM with QEMU can be easily integrated into shell scripts for automating the start, stop, and management of the FreeBSD VM without the need to set up a web interface or complex APIs like those required by hypervisors. This makes managing your VM more flexible and faster.

Conclusion

On an Orange Pi 5+ running Armbian, with limited resources like 16 GB of RAM and 8 CPU cores (or worst Raspberry Pi5 8 GB of RAM and 4 CPU cores), using QEMU directly to run a FreeBSD virtual machine is much more efficient than installing a full hypervisor like Proxmox. With QEMU, you avoid unnecessary overhead, optimize resource utilization, and maintain direct control over your VM while also overcoming FreeBSD’s hardware limitations on this platform.

My script to manager a single FreeBSD VM on Orange Pi5+ with 1TB NVME and 2 USB3 SSD drives:

#!/bin/sh

QEMUBIN=/usr/bin/qemu-system-aarch64
BSDPROD="-name FreeBSD14-jcm -machine virt,accel=kvm -smp 8 -cpu host -m 10240 -enable-kvm \
-drive file=/qemu/AAVMF_CODE.fd,format=raw,if=pflash,unit=0,readonly=on \
-drive file=/qemu/AAVMF_VARS-jcm.fd,format=raw,if=pflash,unit=1 \
-drive if=virtio,file=/qemu/vm-100-disk-1-jcm.raw,format=raw \
-drive if=virtio,file=/qemu/vm-100-disk-2-jcm.raw,format=raw \
-rtc base=localtime \
-device virtio-net-pci,netdev=net0,mac=de:ad:be:ef:00:01 \
-netdev bridge,id=net0,br=br0 \
-device virtio-net-pci,netdev=net1,mac=de:ad:be:ef:fa:ce \
-netdev bridge,id=net1,br=br1 \
-uuid 2e0674f0-7ffe-4314-b9bf-deadbeef0001 \
-chardev socket,id=charchannel0,path=/var/run/qga-freebsd-jcm.sock,server=on,wait=off \
-device virtio-serial \
-device virtserialport,chardev=charchannel0,name=org.qemu.guest_agent.0 \
-monitor unix:/tmp/qemu-monitor-freebsd-jcm,server,nowait \
-chardev socket,id=charconsole,path=/tmp/qemu-jcm-tty,server=on,wait=off \
-serial chardev:charconsole \
-drive file=/dev/disk/by-id/usb-USB_3.1_0_Device_00000000545E-0:0,if=virtio,id=drive-virtio0,cache=directsync,format=raw,aio=io_uring,detect-zeroes=on \
-drive file=/dev/disk/by-id/usb-USB_3.1_1_Device_00000000545E-0:1,if=virtio,id=drive-virtio1,cache=directsync,format=raw,aio=io_uring,detect-zeroes=on \
-display none \
-daemonize"

BSDINST="-name FreeBSD14-jcm -machine virt,accel=kvm -smp 8 -cpu host -m 8192 -enable-kvm \
-drive file=/qemu/AAVMF_CODE.fd,format=raw,if=pflash,unit=0,readonly=on \
-drive file=/qemu/AAVMF_VARS-jcm.fd,format=raw,if=pflash,unit=1 \
-cdrom /qemu/FreeBSD-14.1-RELEASE-arm64-aarch64-dvd1.iso \
-drive if=none,file=/qemu/FreeBSD-14.1-RELEASE-arm64-aarch64-dvd1.iso,media=cdrom,id=cdrom0 \
-drive if=virtio,file=/qemu/vm-100-disk-1-jcm.raw,format=raw,cache=none,aio=native \
-drive if=virtio,file=/qemu/vm-100-disk-2-jcm.raw,format=raw,cache=none,aio=native \
-cpu host \
-rtc base=localtime \
-netdev bridge,id=net0,br=br0 \
-device virtio-net-pci,netdev=net0,mac=de:ad:be:ef:00:01 \
-uuid 2e0674f0-7ffe-4314-b9bf-deadbeef0001 \
-chardev socket,id=charchannel0,path=/var/run/qga-freebsd-jcm.sock,server=on,wait=off \
-device virtio-serial \
-device virtserialport,chardev=charchannel0,name=org.qemu.guest_agent.0 \
-monitor unix:/tmp/qemu-monitor-freebsd-jcm,server,nowait \
-nographic \
-no-reboot"

case "$1" in

start|faststart|quietstart)
$QEMUBIN $BSDPROD;
;;

stop|faststop|quietstop)

# arret de la VM FreeBSD (communique avec le guest-agent de la VM)
echo '{"execute":"guest-shutdown"}' | socat - UNIX-CONNECT:/var/run/qga-freebsd-jcm.sock

;;

install)
$QEMUBIN $BSDINST;

;;

console)

# console
echo 'Sortir de la console par ctrl-O:'
socat -,raw,echo=0,escape=0x0f UNIX-CONNECT:/tmp/qemu-jcm-tty

;;
debug)

# arret du qemu
# echo "quit" | socat - UNIX-CONNECT:/tmp/qemu-monitor-freebsd-jcm
socat - UNIX-CONNECT:/tmp/qemu-monitor-freebsd-jcm

;;
esac


exit 0;


RTE FRANCE – EDF Option TEMPO – effacement de consommation électrique

L’effacement de consommation électrique ou lissage de la courbe de charge par le pilotage de la demande consiste, en cas de déséquilibre offre-demande d’électricité, à provisoirement réduire la consommation physique d’un site donné ou d’un groupe d’acteurs (par rapport à sa consommation « normale »).

Avec un objectif d’effacement de consommation électrique EDF propose l’option Tempo.
Vous disposez alors de 6 tarifs différents du kWh, en fonction des créneaux horaires (heures pleines et heures creuses), et de la couleur des jours, 22 jours rouges, 43 jours blancs et le reste de l’année (jours bleus) à un tarif avantageux.

Les jours rouges ont lieu exclusivement pendant la période hivernale. Ils sont répartis entre le 1ᵉʳ novembre 2022 et le 31 mars 2023. Les week-ends et jours fériés ne sont jamais des jours Rouges : il ne peut donc y avoir plus de cinq jours rouges d’affilée.

Ce tarif peut être avantageux pour les clients en mesure d’adapter leur consommation au tarif du jour en baissant le chauffage ou en limitant drastiquement l’usage d’appareils électriques comme les machines à laver ou lave-vaisselle lors de jours Rouge. Il est aussi très avantageux pour la charge de véhicule électrique la nuit.

Voici les tarifs EDF au 1er Février 2023:

Afin d’obtenir l’information qui concerne la couleur du jour en cours ou à venir (J+1), il y existe diverses solutions fournis par EDF via SMS, Email ou leur application Mobile.

Toutefois avec la domotique il y a moyen d’automatiser les actions (commande de prises, charge de véhicule électrique, etc.), j’ai donc décidé d’utiliser l’API de RTE (*) FRANCE.
(*) Réseau de transport d’électricité, est le gestionnaire de réseau de transport français responsable du réseau public de transport d’électricité haute tension en France métropolitaine. Sa mission fondamentale est d’assurer à tous ses clients l’accès à une alimentation électrique économique, sûre et propre.

La procédure à suivre chez RTE n’est pas des plus simple et ceci juste pour obtenir la couleur d’un jour…

Dans un objectif de simplification je vais juste utiliser la commande cURL et  un peu de Shell Script dans un environnement type Linux.

Ouvrir un compte ici: https://data.rte-france.com/

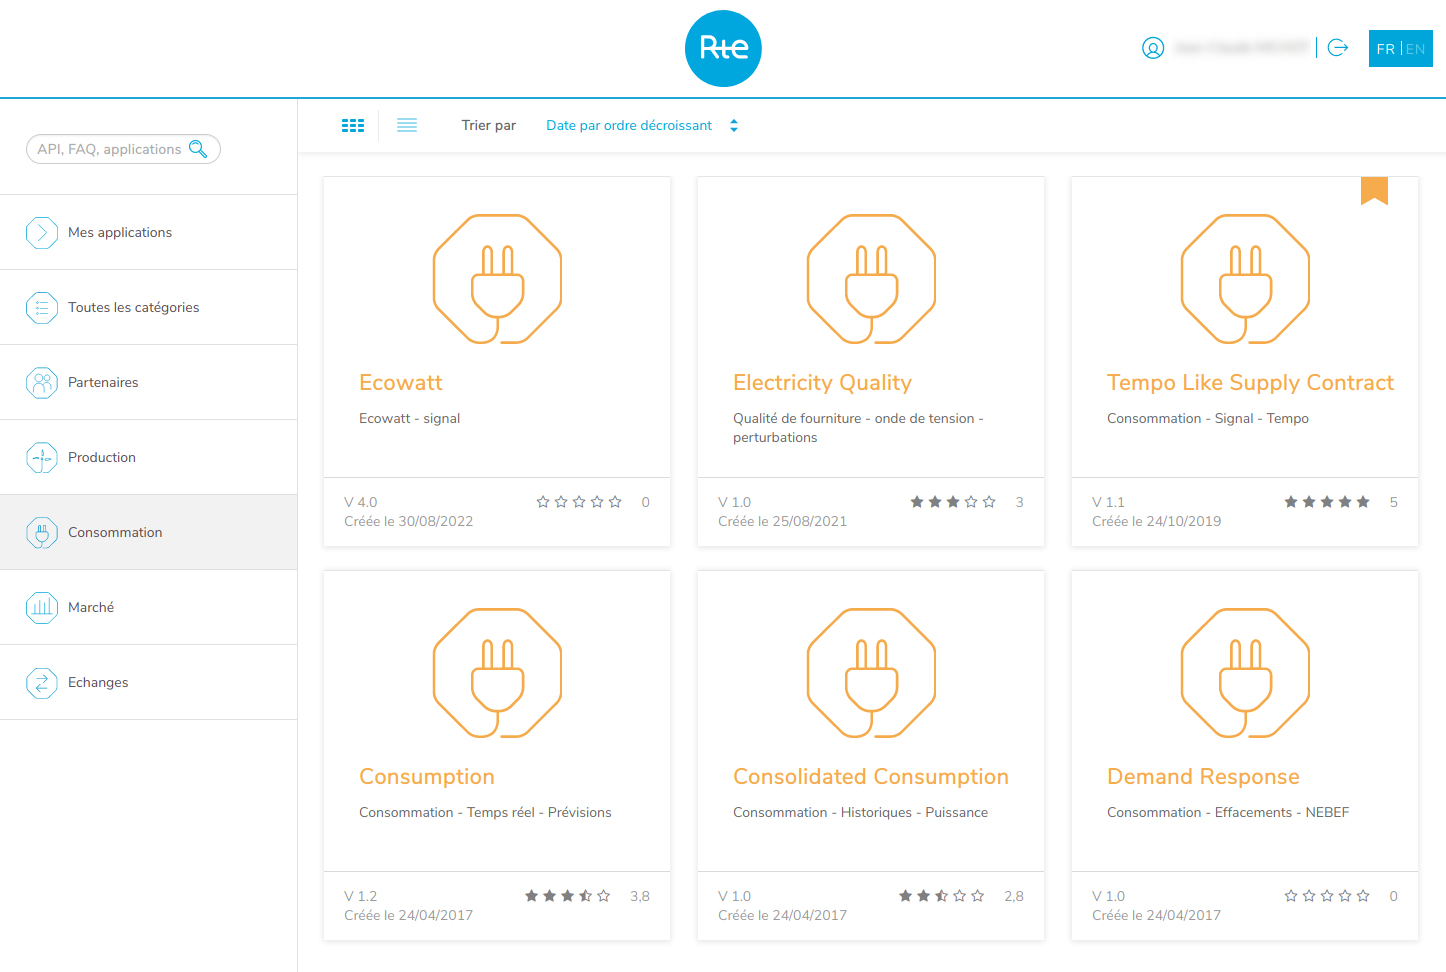
1/ choisir Consommation

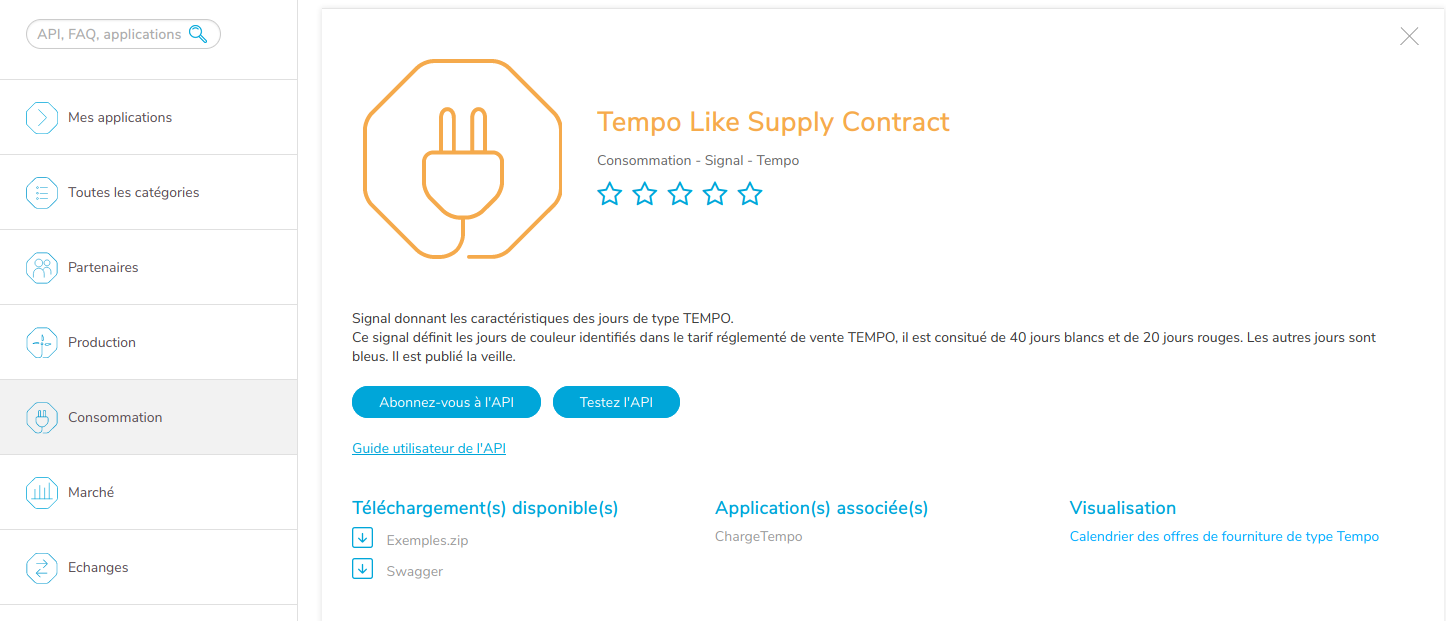
2/ Abonnez vous à l’API « Tempo Like Supply Contract »

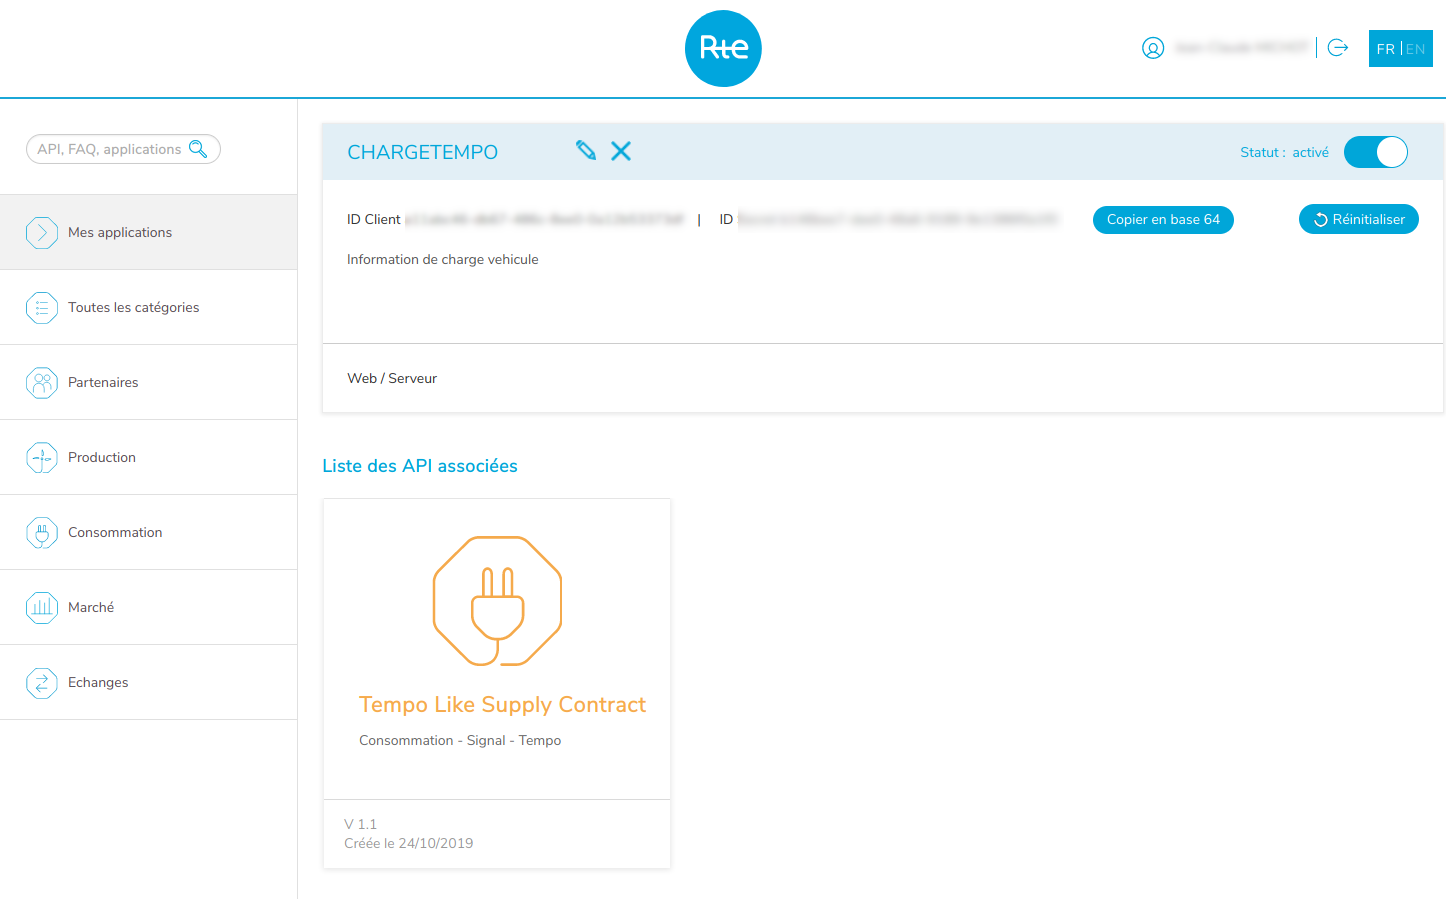
3/ Créer une application (dans mon cas, je l’ai nommé « CHARGETEMPO)

Avec l’application vous avez obtenu un « Client ID » et un « Secret ID » que vous aller utiliser pour avoir accès à l’API via une authentification 0auth.

La documentation de l’API est accessible ici:
https://data.rte-france.com/catalog/-/api/doc/user-guide/Tempo+Like+Supply+Contract/1.1

4/ Obtenir un token d’accès 0auth

% curl -X POST -H « Content-Type: application/x-www-form-urlancoded » –user VOTRE_CLIENT_ID:VOTRE_SECRET_ID https://digital.isarvicas.rte-france.com/tokan/oauth/

Vous obtenez une réponse JSON avec un TOKEN valable 7200 secondes (2 heures)

{
« access_token » : « FEoKSqFP5babNstyVXLVsPAUyqaTatuBLRZNjHiPMZDlsFVIM62Kq7 »,
« token_type » : « Bearer »,
« expires_in » : 7200
}

5/ Obtenir la couleur du jour (enfin !!!):

Voici l’exemple d’une demande à l’API sans spécification de date et pour obtenir une sortie en XML avec le TOKEN obtenu au 4/

% /curl -s -H « Accept: application/xml » -H « Authorization: Bearer FEoKSqFP5babNstyVXLVsPAUyqaTatuBLRZNjHiPMZDlsFVIM62Kq7 » « https://digital.iservices.rte-france.com/open_api/tempo_like_supply_contract/v1/tempo_like_calendars

Vous obtenez une réponse XML:

<Tempo><DateHeureCreation>2023-02-03</DateHeureCreation><DateApplication>2023-02-04</DateApplication><Couleur>BLANC</Couleur></Tempo>

Il est aussi possible d’avoir le retour en JSON, il faut juste mettre « -H « Accept: application/json » à la place du « -H « Accept: application/xml » lors de la demande.

Voici un petit script pour obtenir l’information rapidement:

#!/bin/sh

ID="VOTRE_ID"
SECRET="VOTRE_SECRET"
DSTART=`date "+%Y-%m-%dT00:00:00+01:00"`
DEND=`date -v +1d "+%Y-%m-%dT00:00:00+01:00"`
FILENAME=/var/tmp/tempo/`date "+%Y-%m-%d"`.xml

TOKEN=`/usr/local/bin/curl -s -X POST -H "Content-Type: application/x-www-form-urlencoded" --user $ID:$SECRET https://digital.iservices.rte-france.com/token/oauth/ | /usr/local/bin/jq .access_token`

TOKEN=`echo $TOKEN | sed s/\"//g`

DATAXML=`/usr/local/bin/curl -s -H "Accept: application/xml" -H "Authorization: Bearer $TOKEN" "https://digital.iservices.rte-france.com/open_api/tempo_like_supply_contract/v1/tempo_like_calendars?start_date=$DSTART&end_date=$DEND"`

echo $DATAXML

FreeBSD – Raspberry pi3 with WiFi


Raspberry Pi3 WiFi over USB nano dongle wireless IEEE802.11b/g/n 150 Mbit/s

Edimax EW-7811Un V2 Adaptateur Wi-Fi 4 nano (version 2)

Low price, but low performance with FreeBSD

FreeBSD pi3-freebsd 13.1-RELEASE FreeBSD 13.1-RELEASE releng/13.1-n250148-fc952ac2212 GENERIC arm64

# add to file /etc/rc.conf
wlans_rtwn0="wlan0"
ifconfig_wlan0="WPA DHCP SYNC"
create_args_wlan0="country France"

# add to file /etc/wpa_supplicant.conf
ctrl_interface=/var/run/wpa_supplicant
ctrl_interface_group=wheel
country=FR
eapol_version=2
fast_reauth=1
network={
ssid="MySSID"
priority=0
key_mgmt=WPA-PSK
proto=WPA2
psk="MyPreSharedKey"
}
# add to file /boot/loader.conf
# pour clef WiFi - Realtek Edimax N150 Adapter RTL8188EU
if_rtwn_usb_load="YES"
if_rtwn_load="YES"
rtwn-rtl8188eufw_load="YES"
wlan_wep_load="YES"
wlan_tkip_load="YES"
wlan_ccmp_load="YES"
wlan_amrr_load="YES"
legal.realtek.license_ack=1

* REBOOT *

# ifconfig wlan0
root@pi3-freebsd:~ # ifconfig wlan0
wlan0: flags=8843<UP,BROADCAST,RUNNING,SIMPLEX,MULTICAST> metric 0 mtu 1500
ether 08:be:ac:15:95:c7
inet 192.168.0.47 netmask 0xffffff00 broadcast 192.168.0.255
groups: wlan
ssid MySSID channel 8 (2447 MHz 11g ht/20) bssid b0:be:76:77:d6:3b
regdomain ETSI country F2 authmode WPA2/802.11i privacy ON
deftxkey UNDEF AES-CCM 2:128-bit txpower 30 bmiss 7 scanvalid 60
protmode CTS ht20 ampdulimit 64k ampdudensity 8 shortgi -stbc -ldpc
-uapsd wme roaming MANUAL
parent interface: rtwn0
media: IEEE 802.11 Wireless Ethernet MCS mode 11ng
status: associated
nd6 options=29<PERFORMNUD,IFDISABLED,AUTO_LINKLOCAL>
# ifconfig wlan0 list scan
SSID/MESH ID BSSID CHAN RATE S:N INT CAPS
MySSID ff:ff:ff:18:75:50 1 54M -84:-95 100 EPS RSN BSSLOAD HTCAP WME
MySSID ff:ff:ff:b2:42:14 11 54M -95:-95 100 EP RSN WPA WME
MySSID ff:ff:ff:dc:6b:ab 3 54M -95:-95 100 EP HTCAP RSN BSSLOAD WME WPS
MySSID ff:ff:ff:77:d6:3b 12 54M -76:-95 100 EPS RSN BSSLOAD HTCAP WME

# Low Performance 🙁

# Local IP is 192.168.0.4, GW 192.168.0.61, WiFi AP TP-Link ArcherC7

root@pi3-freebsd:~ # iperf3 -c 192.168.0.61 -w 1024K -p 9000 -R --get-server-output
Connecting to host 192.168.0.61, port 9000
Reverse mode, remote host 192.168.0.61 is sending
[ 5] local 192.168.0.47 port 58584 connected to 192.168.0.61 port 9000
[ ID] Interval Transfer Bitrate
[ 5] 0.00-1.00 sec 2.89 MBytes 24.2 Mbits/sec
[ 5] 1.00-2.00 sec 2.77 MBytes 23.2 Mbits/sec
[ 5] 2.00-3.00 sec 2.83 MBytes 23.7 Mbits/sec
[ 5] 3.00-4.00 sec 2.77 MBytes 23.2 Mbits/sec
[ 5] 4.00-5.00 sec 2.76 MBytes 23.2 Mbits/sec
[ 5] 5.00-6.00 sec 2.76 MBytes 23.2 Mbits/sec
[ 5] 6.00-7.00 sec 2.83 MBytes 23.7 Mbits/sec
[ 5] 7.00-8.00 sec 2.94 MBytes 24.7 Mbits/sec
[ 5] 8.00-9.00 sec 2.78 MBytes 23.3 Mbits/sec
[ 5] 9.00-10.00 sec 2.84 MBytes 23.8 Mbits/sec
- - - - - - - - - - - - - - - - - - - - - - - - -
[ ID] Interval Transfer Bitrate Retr
[ 5] 0.00-10.14 sec 29.2 MBytes 24.1 Mbits/sec 0 sender
[ 5] 0.00-10.00 sec 28.2 MBytes 23.6 Mbits/sec receiver

Server output:
-----------------------------------------------------------
Server listening on 9000 (test #4)
-----------------------------------------------------------
Accepted connection from 192.168.0.47, port 46405
[ 5] local 192.168.0.61 port 9000 connected to 192.168.0.47 port 58584
[ ID] Interval Transfer Bitrate Retr Cwnd
[ 5] 0.00-1.00 sec 3.64 MBytes 30.6 Mbits/sec 0 267 KBytes
[ 5] 1.00-2.00 sec 2.75 MBytes 23.0 Mbits/sec 0 282 KBytes
[ 5] 2.00-3.00 sec 2.81 MBytes 23.6 Mbits/sec 0 296 KBytes
[ 5] 3.00-4.00 sec 2.76 MBytes 23.2 Mbits/sec 0 310 KBytes
[ 5] 4.00-5.00 sec 2.75 MBytes 23.0 Mbits/sec 0 322 KBytes
[ 5] 5.00-6.00 sec 2.75 MBytes 23.1 Mbits/sec 0 334 KBytes
[ 5] 6.00-7.00 sec 2.82 MBytes 23.6 Mbits/sec 0 346 KBytes
[ 5] 7.00-8.00 sec 2.92 MBytes 24.5 Mbits/sec 0 359 KBytes
[ 5] 8.00-9.00 sec 2.77 MBytes 23.2 Mbits/sec 0 370 KBytes
[ 5] 9.00-10.00 sec 2.83 MBytes 23.8 Mbits/sec 0 381 KBytes
[ 5] 10.00-10.14 sec 365 KBytes 21.7 Mbits/sec 0 381 KBytes
- - - - - - - - - - - - - - - - - - - - - - - - -
[ ID] Interval Transfer Bitrate Retr
[ 5] 0.00-10.14 sec 29.2 MBytes 24.1 Mbits/sec 0 sender

FreeBSD des jails avec iocage… ou pas…

J’ai testé juste pour voir… iocage

J’ai créé une jail via iocage sur un disque ou j’ai de la place… 8 To (en USB).

FreeBSD création de jail du nom de “hb” avec iocage:

iocage activate dd8t
iocage fetch
iocage create -r 12.2-RELEASE -c 1 -n hb
iocage set ip4_addr=”bce0|192.168.0.1/24,lo0|127.0.0.2/32″ hb
iocage set allow_raw_sockets=1 hb
iocage set allow_socket_af=1 hb
iocage start hb
iocage console hb

iocage fonctionne ? on va migrer la jail hb du disque usb externe vers le SSD interne du système (mon système de fichier est ZFS).

iocage stop ALL
zfs unmount -f dd8t/iocage
zfs snapshot -r dd8t/iocage@migration
zfs send -R dd8t/iocage@migration | zfs receive -v zroot/iocage
iocage clean -a
zfs destroy -f dd8t/iocage
iocage activate zroot
zfs destroy -r zroot/iocage@migration

Il n’y a pas un grand intérêt… c’est un peu plus rapide que de faire les jails soit même…

FreeBSD – IoT – homebride – rtl_433

De quoi est-il question ?

L’Internet des objets ou IdO ou en anglais IoT (Internet of Things)

HomeKit est un logiciel de domotique développé par Apple qui permet aux utilisateurs de contrôler les objets connectés de sa maison intelligente via son iPhone, iPad, Mac, …


Le logiciel homebridge permet de rendre compatible HomeKit des équipements (IoT) qui de base ne sont pas compatible avec Apple.

Le projet consiste avec des équipements en place depuis longtemps et non standard Apple à pouvoir obtenir de l’information, commander les objets et déclencher des actions.

Exemple: Via les scénarios HomeKit, Allumer 3 spots (parking, allée, jardin) lorsqu’il y a une détection de mouvement sur la camera parking entre 1/4 d’heure avant le couché du soleil et 1/4 après le levé du soleil.

Le contexte est le suivant, je dispose:

  • de plusieurs capteurs thermo hygrométriques en 433 Mhz (ce type),
  • de capteurs de mouvements et de contact portes/fenêtres, d’alarme, …
  • de capteurs de consommation électrique, maison, prises, …
  • de cameras (dont une sur les places de parking devant la maison),
  • de plusieurs spots LED du parking jusqu’à la porte d’entrée de la maison.

Nous allons donc utiliser sur un serveur de type Raspberry PI avec les logiciels suivants:

Noté qu’avec les informations remontées sur votre téléphone vous pouvez faire votre propre système d’alarmes.

FreeBSD installation du logiciel homebridge:

En plus de hombridge J’ajoute le module d’interface web, la gestion des caméras, le plugin pour la gestion des équipements en 433 Mhz ainsi que le plugin pour les IOT meross dans mon cas, prises, sensors, plug, …

pkg install npm-node14-6.14.8 avahi-libdns
ln -s /usr/local/include/avahi-compat-libdns_sd/dns_sd.h /usr/local/include
npm install -g mdns
npm install -g -unsafe-perm homebridge
npm install -g -unsafe-perm homebridge-config-ui-x
npm install -g -unsafe-perm homebridge-meross
npm install -g -unsafe-perm homebridge-camera-ffmpeg
npm install -g -unsafe-perm homebridge-rtl

# si vous installez un plugin qui ne fonctionne pas comme vous voulez pour d’autres types d’equipements, faire un npm uninstall

npm install -g -unsafe-perm homebridge-samsungsmarttv
npm uninstall homebridge-samsungtv

ajouter dans /etc/rc.conf :

homebridge_enable=YES
homebridge_user=homebridge
homebridge_facility=local0
homebridge_priority=info

ajouter dans /etc/syslog.conf et revoir newsyslog en conséquence:

local0.info /var/log/local0.log

créé un utilisateur homebridge
homebridge:*:1010:1010::0:0:Homebridge Apple:/home/homebridge:/usr/sbin/nologin

Exemple de la configuration homebridge:

{
    "bridge": {
        "name": "Homebridge",
        "username": "AA:BB:CC:DD:EE:FF",
        "port": 51826,
        "pin": "123-45-678"
    },
    "mdns": {
        "interface": "192.168.0.1"
    },
    "description": "My Homebridge",
    "accessories": [],
    "platforms": [
        {
            "name": "Config",
            "port": 8080,
            "auth": "admin",
            "theme": "auto",
            "tempUnits": "c",
            "lang": "auto",
            "sudo": false,
            "log": {
                "method": "file",
                "path": "/var/log/local0.log"
            },
            "platform": "config"
        },
        {
            "name": "Meross",
            "username": "MyUserName",
            "password": "MySecret",
            "disableDeviceLogging": false,
            "debug": true,
            "platform": "Meross"
        },
        {
            "platform": "Camera-ffmpeg",
            "porthttp": "6666",
            "cameras": [
                {
                    "name": "Camera Parking",
                    "motion": true,
                    "videoConfig": {
                        "source": "-rtsp_transport tcp -i rtsp://127.0.0.1:8554/parking_hd",
                        "stillImageSource": "-rtsp_transport tcp -i rtsp://127.0.0.1:8554/parking_hd -vframes 1 -r 1",
                        "maxStreams": 2,
                        "maxWidth": 2560,
                        "maxHeight": 1920,
                        "maxFPS": 16,
                        "audio": true
                    }
                }
            ]
        },
        {
            "platform": "rtl_433",
            "devices": [
                {
                    "id": "123123",
                    "name": "Temperature exterieure",
                    "type": "temperature"

                },
                {
                    "id": "456456",
                    "name": "Porte entree",
                    "type": "contact"
                },
                {
                    "id": "789789",
                    "name": "PIR Parking",
                    "type": "motion"
                }
            ]
        }
    ]
}

Pour signaler un évènement comme une détection de mouvement d’une camera, il y a plusieurs solutions:

  • Avec le logiciel rtl_433, une détection par des capteurs, soit de mouvement (type PIR), soit de contact, la remonter à HomeKit est alors automatique via Homebridge et le module homebridge-rtl
  • et/ou une détection sur la base de l’analyse d’un flux vidéo d’une camera via le logiciel motion, il faut alors faire appel à l’URL:
    http://192.168.0.1:6666/motion?Camera%20Parking
    Dans ma configuration du logiciel motion pour la camera du parking (parking.conf) j’ai:

on_event_start /usr/local/etc/motion/get_parking_event_start %f

C’est juste un petit script pour signaler à homebridge une alarme de mouvement:

#!/bin/sh
# signal motion to homebridge (HomeKit Apple)
/usr/local/bin/wget –quiet –timeout=2 -O /dev/null ‘http://192.168.0.1:6666/motion?Camera%20Parking’

En savoir plus:
https://sunoo.github.io/homebridge-camera-ffmpeg/automation/http.html

Si besoin pour debuger:

DEBUG= »* » /usr/local/bin/homebridge -D

kill -HUP `cat /var/run/homebridge.pid`
/usr/local/etc/rc.d/homebridge start
tail -F /var/log/local0

Gallery Photos – Yappa-ng – PHP7 – video

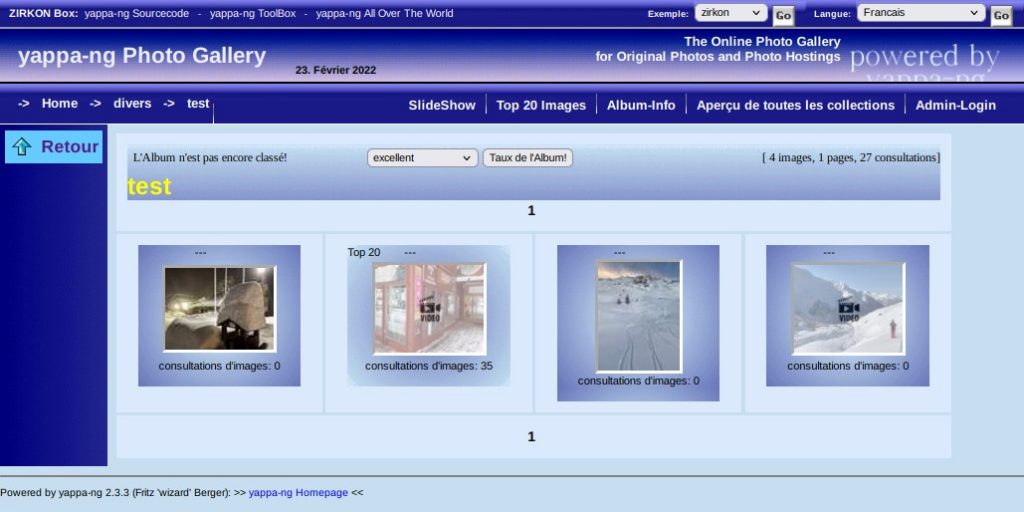
I’m using yappa-ng Photo Gallery since 2003. (yet another php photo album)

Unfortunately this software is no longer maintained and it’s not usable with modern php7+

I like yappa-ng  because it’s light, fast, and doesn’t need database or useless requirement
to manage your photos. You only need PHP and ImageMagick installed on server.
I manage more than 23,000 photos on my small personal FreeBSD server.

To continue to use this software, i have patch the php code, and my version is now PHP 7 compliant.

I also add a video preview to be able to see a thumbnail of video and Exif management of photos orientation to save time and avoid to rotate images manually.
(You need ffmpeg for the video preview)

You can download my patched source code here

Raspberry Pi 4 I/O test and encrypted device I/O

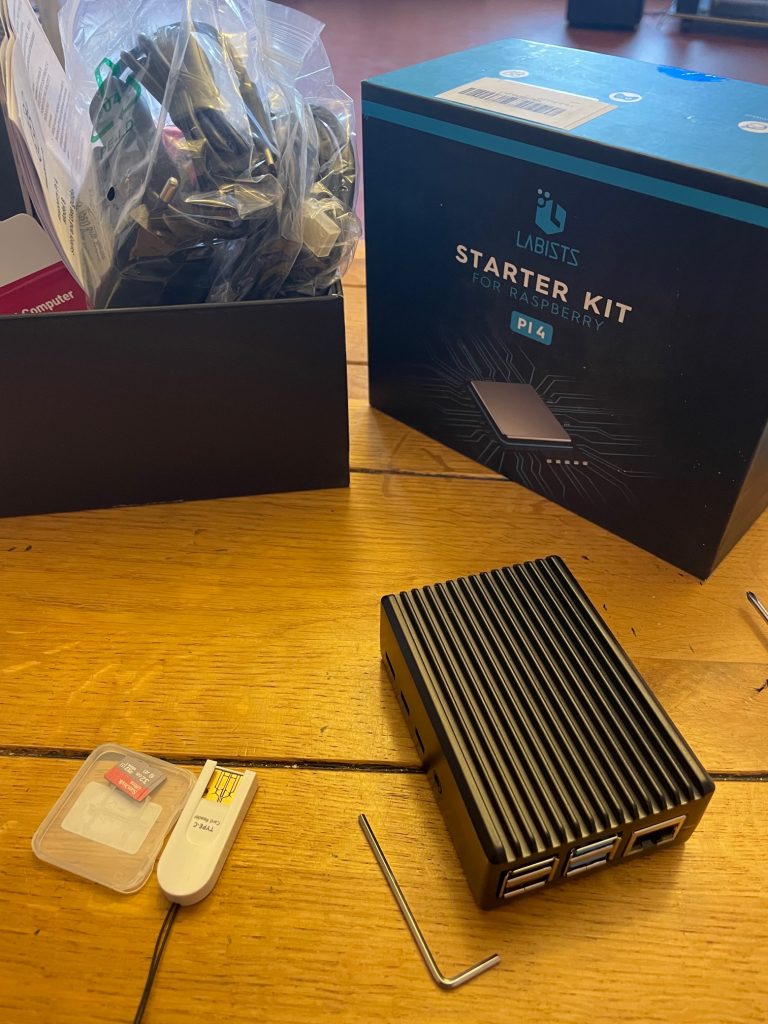
I recently buy a Raspberry Pi4 for future backup of my @home on remote location.

The hardware used :
. Raspberry Pi4 Model B with 8GB ram and 32 GB sandisk
. Inateck USB3/sata case
. 1 GB Crucial SSD

And the Software:
OS is FreeBSD 13.0-RELEASE-p6
% geli version
kernel: 7
userland: 7
% zfs version
zfs-2.0.0-FreeBSD_gf11b09dec
zfs-kmod-2.0.0-FreeBSD_gf11b09dec

My first surprise was to discover than RPi4 doesn’t support hardware AES
Cortex-A72 processor Cryptography engine.
The optional Cryptography Extension is not included in the base product.
ARM supplies the Cryptography Extension only under an additional license.

The Rp4 hardware are build without this license $$$, the result is that all crypto are defined as software (kernel: GEOM_ELI: Crypto: software) same for all my test with openssl.
That’s a really bad news for speed and system load.

I’m ZFS user for long time, and with new openzfs i decide to test the ZFS Encryption support.

Basic I/O test was done by copying 10 GB files on ZFS dataset.

FreeBSD 13.0-RELEASE-p6 on Raspberry Pi4 with usb3 SSD (da0)

ZFS (without crypto): 180 MB/s, da0 busy 100%, load 2
crypto GELI + ZFS   : 107 MB/s, da0 busy 60%, load 5
crypto ZFS Encrypt  : 25 MB/s, da0 busy 95%, load 10

The I/O result with ZFS encrypted dataset are too low for me 🙁 i will continue with GELI…

The old grumpy sysadmin 😉

Vieux^WTres vieux iDrac et Java pas bien…

Pour maintenir des anciens serveurs il est parfois difficile de prendre la main sur de vieux iDrac. L’exemple type c’est les iDrac6 de serveur DELL.

Voici l’exemple d’un script sous FreeBSD qui permet d’avoir accès a l’iDrac sans devoir maintenir  une VM d’un Windows d’un autre temps.

#/bin/sh
#
# acces console iDrac6 / [jcm]
#

HOSTIP="1.2.3.4"
USER=root
PASS=SECRET

# % uname -a
# FreeBSD flash2.usenet-fr.net 12.1-RELEASE-p10 FreeBSD 12.1-RELEASE-p10 GENERIC  amd64
# % pkg info | grep openjdk
# openjdk11-jre-11.0.8+10.1      Java Runtime Environment 11

# Modification a faire a l'openjdk (autorise les securites obsoletes)
# cd /usr/local/openjdk11-jre/conf/security/java.security
# cp java.security java.security.ORG
# ramplcer:
#  #jdk.certpath.disabledAlgorithms=MD2, MD5, SHA1 jdkCA & usage TLSServer, RSA keySize < 1024, DSA keySize < 1024, EC keySize < 224
#  #jdk.jar.disabledAlgorithms=MD2, MD5, RSA keySize < 1024, DSA keySize < 1024
#  #jdk.tls.disabledAlgorithms=SSLv3, RC4, DES, MD5withRSA, DH keySize < 1024,  EC keySize < 224, 3DES_EDE_CBC, anon, NULL
# par
#  jdk.certpath.disabledAlgorithms=MD2
#  jdk.jar.disabledAlgorithms=MD2
#  jdk.tls.disabledAlgorithms=NULL

wget --no-check-certificate "https://$HOSTIP/software/avctKVM.jar"

java -cp avctKVM.jar -Djava.library.path=./lib com.avocent.idrac.kvm.Main ip=$HOSTIP kmport=5900 vport=5900 user=$USER passwd=$PASS apcp=1 version=2 vmprivilege=true "helpurl=https://$HOSTIP:443/help/contents.html"
 
rm -f avctKVM.jar

La fin du monde en 2038… après ma retraite… ou pas…

Pour savoir de quoi il est question je vous invite à lire:

Bug de l’an_2038

Alors 2038 c’est loin… mais finalement non, nous gérons des abonnements pour des périodes
allant jusqu’à 10 ans… demain en 2028… nous risquons d’avoir des problèmes.

Donc avec des bases SQL MariaDB ou MySQL qui ont toujours des fonctions limitées en 32 bits, nous allons avoir des problèmes…

Voici donc comment remplacer  les fonctions SQL UNIX_TIMESTAMP() et FROM_UNIXTIME() par des fonctions ou les dates > 2038-01-19 03:14:07 UTC ne sont pas (trop) un problème.

In MySql and MariaDB the TIMESTAMP data type is used for values that contain both date and time parts.
TIMESTAMP has a range of ‘1970-01-01 00:00:01’ UTC to ‘2038-01-19 03:14:07’ UTC.
This is due to the underlying 32-bit limitation.

Avec les « SUPER » pouvoir MySQL 😉

DROP function IF EXISTS unix_timestamp_fixed;
DROP function IF EXISTS from_unixtime_fixed;

CREATE FUNCTION unix_timestamp_fixed (v DATETIME)
RETURNS BIGINT DETERMINISTIC
RETURN TIMESTAMPDIFF(SECOND, FROM_UNIXTIME(0), v);

CREATE FUNCTION from_unixtime_fixed (v BIGINT)
RETURNS DATETIME DETERMINISTIC
RETURN DATE_ADD(FROM_UNIXTIME(0), INTERVAL v second);

SHOW function status;

exemple:

SELECT unix_timestamp_fixed('2040-01-02 03:04:05');
+---------------------------------------------+
| unix_timestamp_fixed('2040-01-02 03:04:05') |
+---------------------------------------------+
| 2209082645                                  |
+---------------------------------------------+

SELECT from_unixtime_fixed( 2209082645 );
+-----------------------------------+
| from_unixtime_fixed( 2209082645 ) |
+-----------------------------------+
| 2040-01-02 03:04:05               |
+-----------------------------------+
% date -r 2209082645
Mon Jan 2 03:04:05 CET 2040

On a l’impression que c’est bon… mais non pas du tout   /!\

SELECT unix_timestamp_fixed('2021-10-10 20:29:34');
+---------------------------------------------+
| unix_timestamp_fixed('2021-10-10 20:29:34') |
+---------------------------------------------+
| 1633894174                                  |
+---------------------------------------------+
% date -r 1633894174
Sun Oct 10 21:29:34 CEST 2021

Raté 1h de décalage, probablement une question de Fuseau horaire

Donc cela ne fonctionne pas, c’est pas très utile… donc vous devez plus probablement tenir compte de votre fuseau horaire pour ne pas avoir de différence entre UNIX_TIMESTAMP() et unix_timestamp_fixed()

Ici en France à Paris en 2021 on oscille entre UTC+1 et UTC+2,  pour ceux que cela intéresse:
https://fr.wikipedia.org/wiki/Heure_en_France

Voila donc fonction unix_timestamp_fixed() « compatible » avec UNIX_TIMESTAMP()

CREATE FUNCTION unix_timestamp_fixed (v DATETIME)
RETURNS BIGINT DETERMINISTIC
RETURN TIMESTAMPDIFF(SECOND, '1970-01-01', v)+
       TIMESTAMPDIFF(SECOND, v, CONVERT_TZ(v, @@SESSION.TIME_ZONE, '+00:00'));

SELECT unix_timestamp_fixed('2021-10-10 20:29:34');
+---------------------------------------------+
| unix_timestamp_fixed('2021-10-10 20:29:34') |
+---------------------------------------------+
| 1633890574                                  |
+---------------------------------------------+

% date -r 1633890574
Sun Oct 10 20:29:34 CEST 2021

SELECT unix_timestamp_fixed('2042-10-10 20:29:34');
+---------------------------------------------+
| unix_timestamp_fixed('2042-10-10 20:29:34') |
+---------------------------------------------+
| 2296585774                                  |
+---------------------------------------------+

% date -r 2296585774
Fri Oct 10 22:29:34 CEST 2042

Arrggg Caramba, encore raté !!! Après 2038 il y a encore un décalage avant c’est ok…